Save and Open Projects
If you have added measurements, markup, or layers to a map, you can save a map as a project, and then share it with others or continue to work on it later. You can save a project to the server or as file to your computer. When you save a project to the server, the application creates a URL that you can send to others. When they paste the URL into a browser, it opens your project and they can see your map. Once you have saved a project, you open it again by clicking Open Project ![]() (on the server) or Open Project File (on your computer).
(on the server) or Open Project File (on your computer).
To save a project to the server:
-
Click the arrow beside the Save Project icon
 in the top left corner of the Toolbar.
 -
From the drop-down menu, click one of the following:

- Save Project: Saves the project to the server once you have filled in the details in the Save Project dialog box, or saves an update to a project that you have saved before.
- Save Project As: Saves a new project to the server.
-
In the Save Project dialog, enter the following:
- Project Name: Type a descriptive name for the project.
- Created By: The name of the person who created the project.
- Description (optional): Any additional information to identify the project.
-
Thumbnail: Shows the small image of the project that will be used to identify the project.
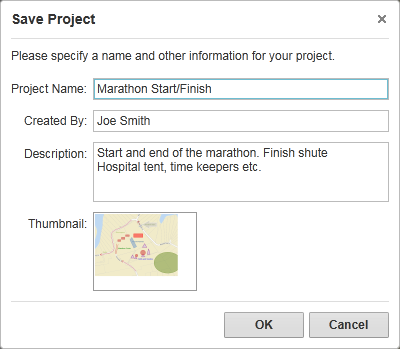
Save Project dialog box
-
Click OK.
A message confirms that Your project has been saved.
In the box below the message is a URL that you can copy. You can then use this URL to open the project from a browser or to send to others so that they can open your project too.
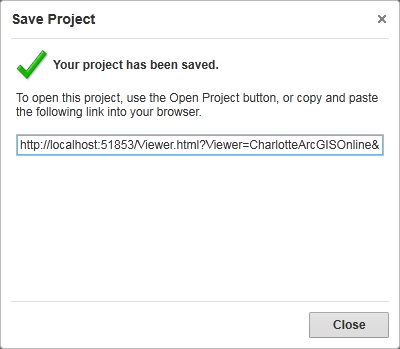
Confirmation message and URL to open the project
- Click Close to return to the map.
To save a project to your computer:
-
Click the arrow beside the Save Project icon
in the top left corner of the Toolbar. -
From the drop-down menu, click Save Project File:
-
The Save As dialog box opens so that you can navigate to the folder on your computer where you want to save the file.
-
Click Save.
The Save Project dialog box opens.
Save Project dialog box
- In the Save Project dialog, enter the following:
- Project Name: Type a descriptive name for the project.
- Created By: The name of the person who created the project.
- Description (optional): Any additional information to identify the project.
- Thumbnail: View a small image of the project that identifies the project.
- Click OK to save the project as a file.
To open a project saved to your computer:
-
On the Toolbar, click Open Project.

The Open Project dialog box opens.

Projects listed in the Open Project dialog
-
In the Filter box, type the beginning of any word from your project.
You can use any word from the project name or description, or the person who created the project. As you begin typing, the projects that match the letters are listed for you to select.
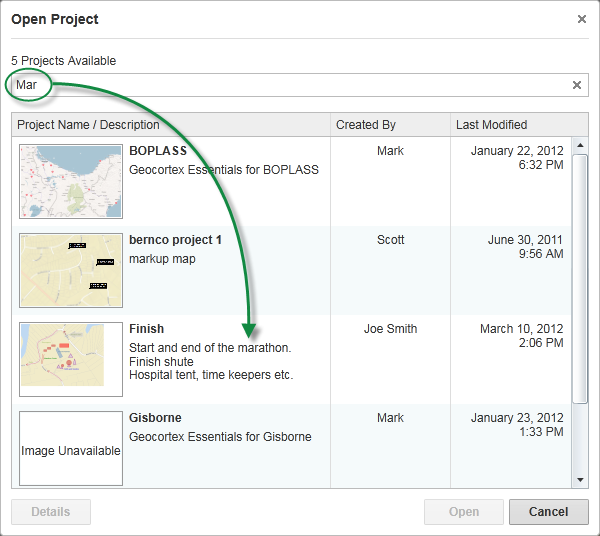
Projects that contain the letters in the filter are listed
-
Select the project you want, and then click Open.
The project opens at the same zoom setting it was saved and includes all the markup and layers that you saved.
To open a project file saved to your computer:
-
On the Toolbar, click the Open Project drop-down arrow.
-
Click Open Project File.
A Windows navigation dialog opens so that you can locate the project file on your computer.
- Select the project and click Open.
See also...